Maintaining the safety and value of your house requires replacing your roof, even though it’s an expensive project. However, a new roof can actually recoup as much as 60% of its initial cost when you sell your home.
To assist Wisconsin homeowners, we have created a comprehensive blog post that will walk you through the entire roof replacement process, ensuring that you make an informed decision and that the project is completed successfully.
Preparing for a Roof Replacement
As the first step in the roof replacement process, it is important that homeowners have access to all the required permits and information that will allow them to have a smooth replacement:
#1. Securing Permits
Before starting any roof replacement work, it’s essential to secure the necessary permits as per local regulations. These permits ensure adherence to building codes and safety standards:
- Local Permit Needs: Roof replacements in Mayville, Wisconsin, often require permits, but rules vary. Check with local experts for current requirements.
- Historical Homes: For historical properties, permits are crucial to maintain authenticity. Each town has a Historic Preservation Commission (HPC) that reviews and approves permit applications for work on these homes.
- General Permit Info: Permits are usually needed for various projects, but minor repairs might be exempt. Confirm with the town or city’s local building inspector.
- State Code and S.321.28: State regulations, like S.321.28 in Wisconsin, detail specific requirements for roof replacements. They specify when permits are needed and how to get them.
- Licensed Contractors: Only licensed contractors can apply for permits. If you hire a licensed roofer, they handle permits, saving you time. Just ensure they’re licensed.
#2. Selecting a Contractor
Choosing the best roofing contractor influences the project’s outcome. Here’s how to identify a reputable and skilled contractor:
- Verify Credentials: Confirm that the contractor holds the necessary licenses, insurance, and bonding, ensuring they possess requisite qualifications and financial coverage for potential damages.
- Assess Experience: Seek a contractor with a documented history of delivering quality work and specializing in roof replacements. Request references from previous projects to evaluate their expertise.
- Review Feedback: Check online reviews and client testimonials to gauge the contractor’s reputation and past client satisfaction levels. Positive feedback reflects reliability and professionalism.
#3. Preparing Your Home
Before commencing the roof replacement process, it’s vital to prepare your home and surroundings for a safe and efficient process:
- Clearing the Roof: Remove any objects from the roof, such as satellite dishes, antennas, or decorations, to facilitate unimpeded access for the roofing crew and avert obstacles and potential damage.
- Securing Loose Items: Rid your yard of loose items susceptible to damage from falling debris during the roof replacement. Secure outdoor furniture, plants, and other belongings to prevent accidents and property damage.
- Shielding Interior Spaces: Safeguard valuable items in your attic or upper floors by covering or relocating them to shield against dust and debris infiltration during the roof replacement process.
Also Read: Should You Stay Home During Roof Replacement
Step-by-Step Guide On How To Replace Your Roof
After collecting all the required permits, you can start replacing your roof by following the steps mentioned below:
#1. Removing the Old Roof
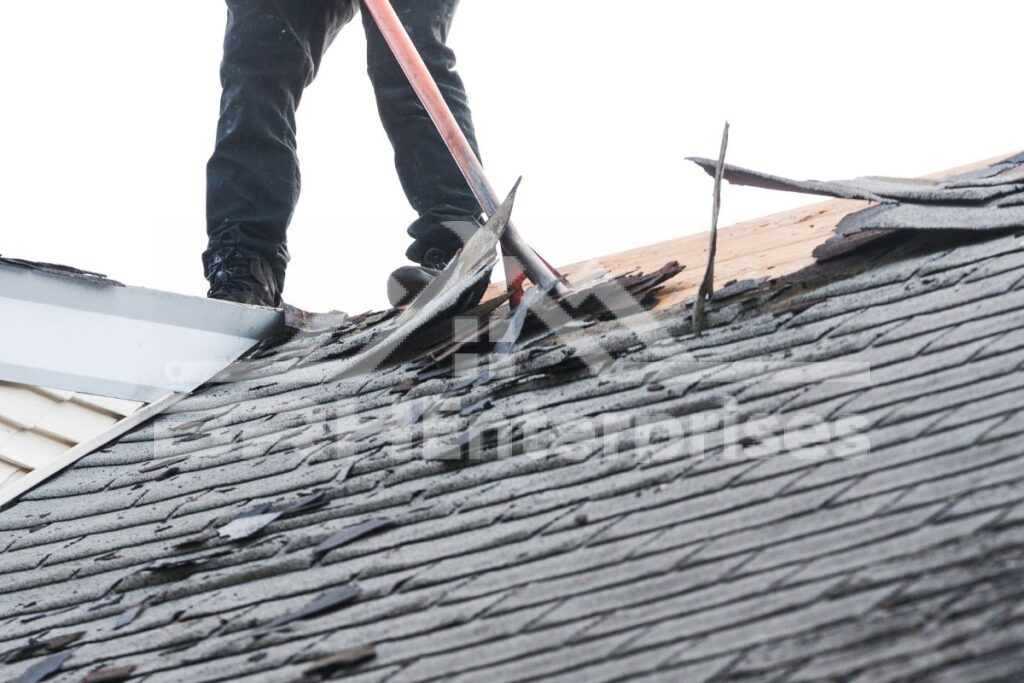
The first step in replacing your roof involves carefully removing the existing roofing materials. This process involves:
- Shingle Removal: Delicately strip off the old shingles and dispose of them properly to avoid environmental risks and adhere to waste disposal guidelines.
- Nail and Staple Removal: Thoroughly extract any remaining nails or staples from the roof deck to create a clean, smooth surface for the new roofing materials.
- Roof Deck Cleaning: After removing the old material, clean the roof deck to get rid of any debris, or dirt that could hinder the installation of the new roofing material.
While removal is part of the process, check ahead of time that disposal is included in the services offered by the contractor. Some don’t offer disposal, and leave the responsibility up to you.
#2. Inspecting the Roof Deck
Once the old roofing material has been removed, the roof deck, which is typically made of oriented strand board (OSB) or plywood, will be exposed and carefully examined. The roofing contractor will look for evidence of hidden structural problems beneath the old roof, such as rot, mold, or water damage.
Finding and fixing any problems with the roof deck is essential to preventing future issues with your roof, especially in Wisconsin where heavy snowfall and ice dams are common in the wintertime and can cause issues.
#3. Repairing or Replacing the Roof Deck
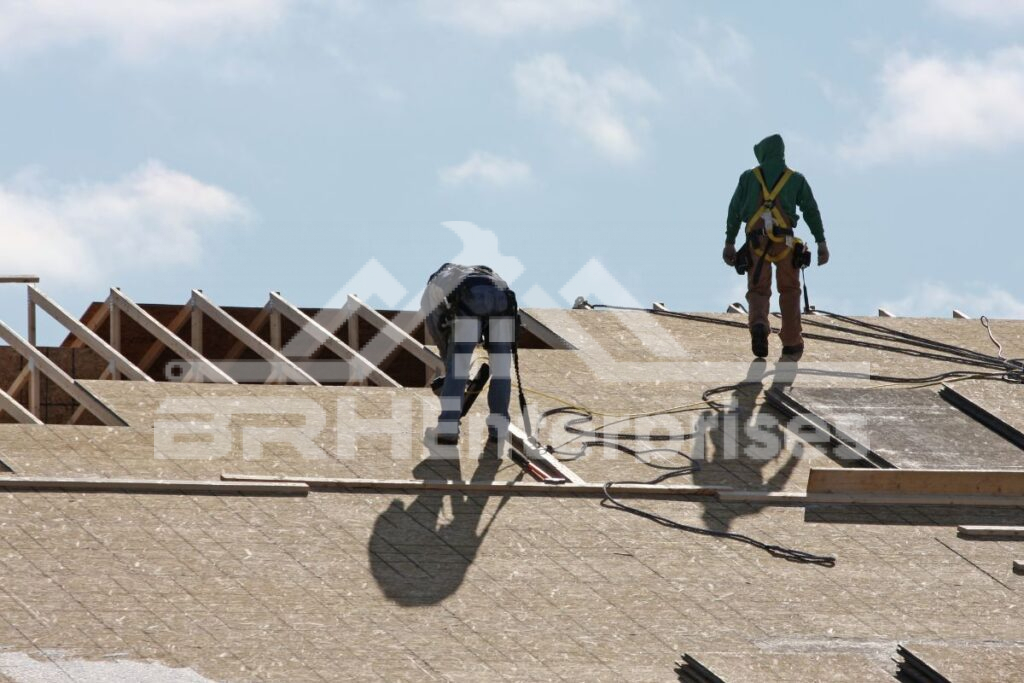
After the tear-off, the roof deck undergoes preparation for the new roofing materials. The loose sheathing is secured, and nail integrity is checked. Vents, pipes, and flashing are replaced as needed, with aluminum or copper flashing installed around chimneys, vents, and valleys using roofing caulk for waterproofing.
Damaged sections are removed and replaced with structurally sound materials, or a full replacement is carried out if necessary. Wisconsin homeowners should note that costs for deck repairs vary based on the severity of the damage and the affected area size. Protruding nails or fasteners are then removed or hammered flush with the deck surface.
#4. Installing Underlayment or Moisture Barrier
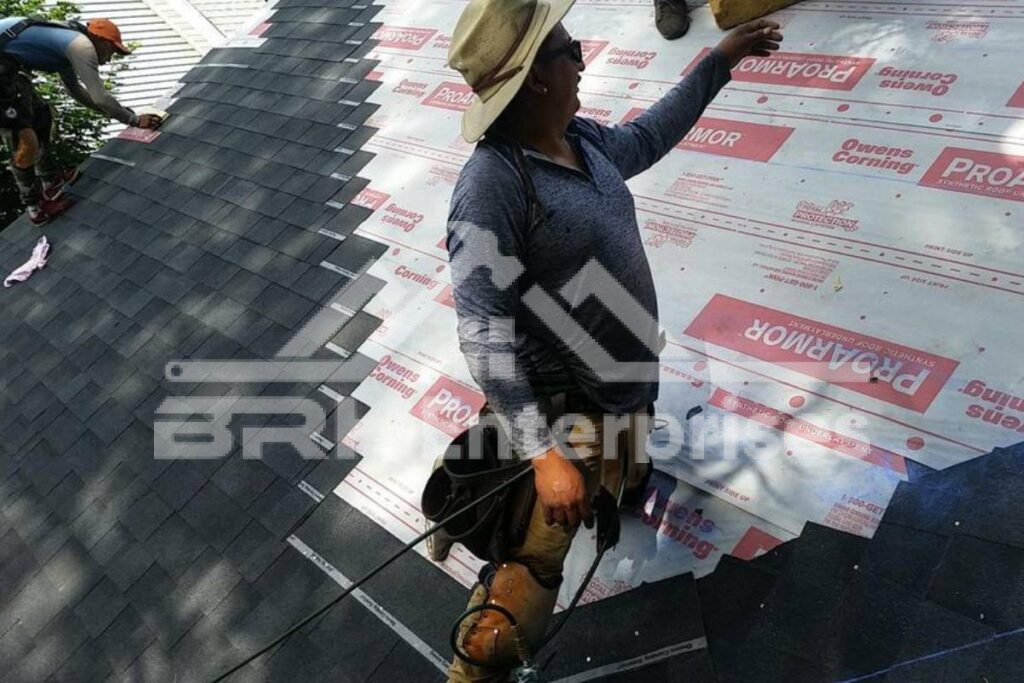
Installing a layer of underlayment or moisture barrier over the entire roof deck is essential in Wisconsin, where high snowfall and ice dams present risks of water infiltration. This additional barrier prevents moisture damage, typically made of felt paper, synthetic underlayment, or a self-adhering membrane.
An ice and water shield is installed in valleys and along the roof’s bottom two to three feet to prevent leaks and water infiltration. Installing drip edges along the eaves is another way to prevent rot and water damage. Applying a synthetic or felt underlayment over the roof deck further enhances the roof’s longevity and weather resistance by acting as a secondary barrier against moisture infiltration.
#5. Installing Flashing
New flashing is installed around chimneys, vents, skylights, and other roof penetrations using durable materials like galvanized steel or aluminum to prevent leaks. Wisconsin homeowners should ensure their contractor uses high-quality flashing to withstand harsh winters.
Roofers apply sealant for a waterproof seal around all seams, edges, and joints to prevent water infiltration. Proper ventilation, such as ridge or soffit vents, are also installed at this time to allow air circulation, prevent moisture buildup, and ensure the roof’s longevity.
#6. Installing the New Roofing Material
Finally, the new material will be installed according to industry best practices and manufacturer specifications. The correct overlapping and fastening techniques, which start at the eaves and work their way upward to the ridge, ensure a waterproof and secure fit.
Wisconsin homeowners should choose building materials that are suited to the region’s climate and can withstand severe winds, ice dams, and heavy snowfall. Installation starts along the eaves, followed by overlapping rows of shingles secured with nails. Proper techniques are crucial for a watertight seal and long-lasting performance.
#7. Final Touches
- Cleaning Up: Once the new roof is in place, it’s time to clean everything up. Remove any leftover materials or debris from the work area to keep it neat and safe.
- Inspecting: Next, examine the new roof closely for problems or mistakes. This helps catch issues early on so they can be addressed right away and ensure the roof is top-notch.
- Sealing: Also seal up any spots that might let water in, like joints or edges. This helps keep the roof strong and watertight so it can protect your home for years to come.
How Often Should You Replace Your Roof?
The roofing market is full of different roofing materials that you can use to replace your roof and make it sturdier. A roof is believed to last at least around 20 to 25 years, but at the same time, it is important to know that each roof material depends on different factors. Below are some of the most common roofing materials that Wisconsin homeowners go for:
| ROOFING MATERIAL | LIFESPAN |
| Asphalt Shingles | 15-30 years |
| Wood Shingles/Shakes | 15-30 years |
| Metal (Steel, Aluminum, Copper) | 40-70 years |
| Clay Tiles | 50-100+ years |
| Concrete Tiles | 20-35+ years |
| Slate | 50-100+ years |
Also Read: What’s The Best Time For Roof Replacement In Wisconsin?
How Much Does It Cost To Replace Your Roof In Wisconsin?
Replacing a roof in Wisconsin is a significant investment, with costs varying widely based on several factors. While the average cost ranges from $4,000 to $12,000 there are some key factors that significantly influence the final amount:
- Material: Options like asphalt shingles, metal, and wood shakes vary in cost.
- Roof size & pitch: Larger roofs with steeper pitches tend to cost more to install.
- Labor costs: The complexity of the job and the contractor’s experience affect labor expenses.
- Design: Replacing additional elements like valleys, vents, and skylights can impact the cost.
- Location: Differences in labor costs, material prices, and building codes by region affect the final expense.
- Additional costs: These costs may include permits, inspection fees, and warranty coverage.
Reasons to Replace Your Roof
Now that you know what the roof replacement process involves, it is also important that you understand some of the reasons why a roof would need to be replaced to begin with. Here are some reasons that influence the decision to replace your roof:
- Age: Roofs last 20 to 30 years. If your roof age is nearing the end of its lifespan, you might want to schedule its replacement.
- Damage: Repetitive damage and more damage than is possible of being repaired calls for a roof replacement.
- Energy Efficiency: Old roofs allow air leaks to occur, which can raise energy bills. New roofs improve energy efficiency.
- Curb Appeal: A new roof enhances appearance. Worn or faded? Consider refreshing.
- Increased Property Value: A well-maintained roof boosts home value.
- Safety Concerns: Old roofs can pose safety risks. Ensure structural integrity.
- Insurance Requirements: Some insurers require updates for coverage.
- Preventive Maintenance: Early action can prevent major issues and repairs.
Conclusion
Replacing your roof is a significant project, but with proper planning as well as execution, it can be an easy task. Remember to take your time, by following each step carefully, and prioritize safety. If you ever feel unsure, don’t hesitate to consult with a professional.
To get the best for your Wisconsin home, trust BRH Enterprises for your roof replacement needs. With years of experience and quality materials, our expert team ensures a durable and beautiful new roof that adds value to your home. Contact us today at (920) 249-4228 for reliable and professional roof replacement services.


